The IP address is one of the most important network components. It’s the personal ID for your Internet connection, allowing your devices to use the service. The IP address allows the administrator to control the connected devices and detect if they are working correctly or not. There are two types of IP addresses: static IP and dynamic IP.
The dynamic IP is managed by the Dynamic Host Configuration Protocol DHCP. It works as a concession with a date of expiry. This means that we can have an IP address ending in 11 today and ending in 19 next day. This is useful for devices with no specific tasks. The static IP remains the same and it’s the most recommendable for devices with specific tasks related to the server. In these cases, the change of IP address could make the system fail.
How to assign static IP to our devices in Windows 11
The operative system Windows 11 has two fast and easy ways to set static IPs. You can do it from the Settings window or from the CMD. The result will be the same. The user only needs to choose the most comfortable one for them.
Set IP from Settings menu
The easiest way to change your IP address to static one in Window 11 is through Settings. You only need to follow these steps:
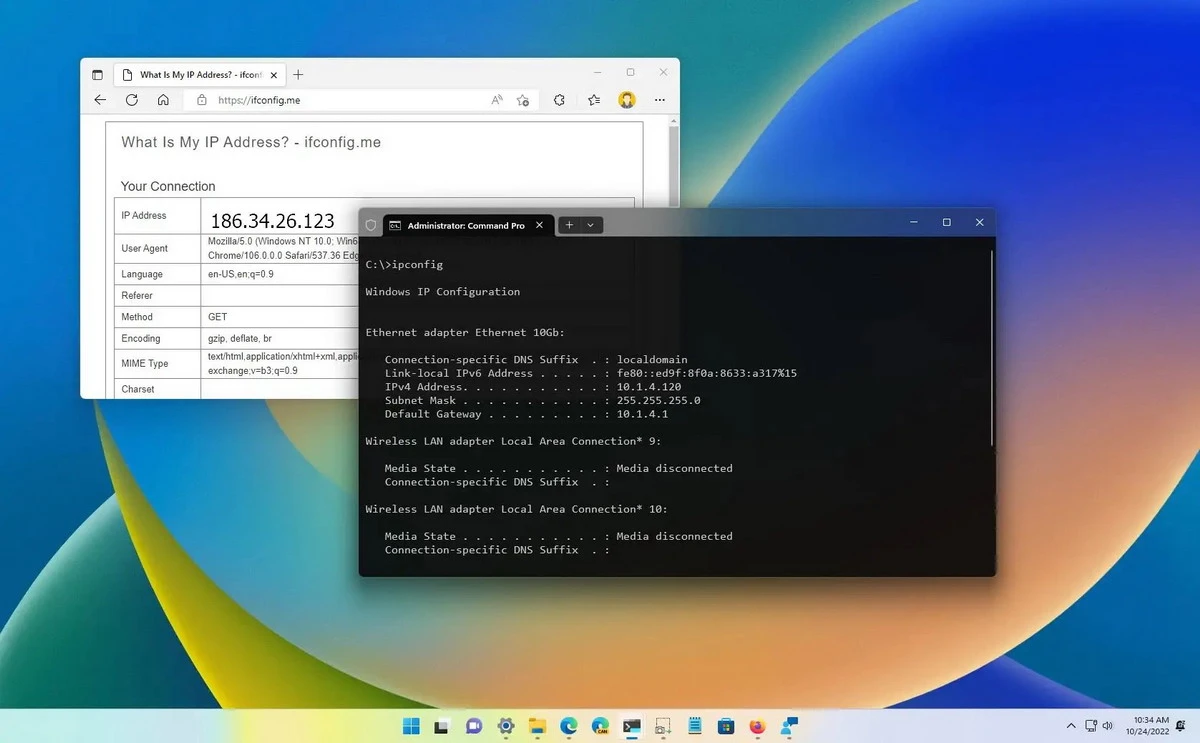
- Open CMD and type ipconfig to validate the IP address.
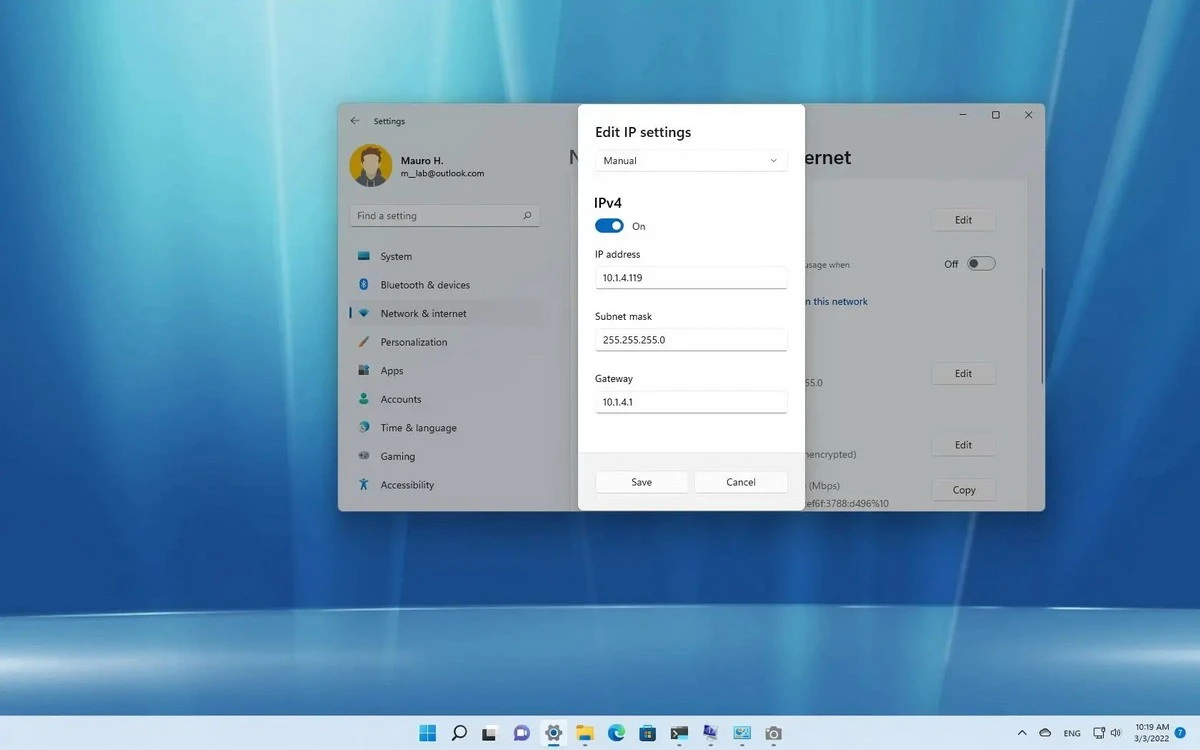
- Open Settings – Network & Internet and select the current network.
- Select IP settings and click the edit button.
- Choose Manual to visualize the current protocols.
- Turn on the IPv4 toogle switch and introduce the IPv4, Subnet mask, Default Gateway and DNS Servers.
- You can choose a different set of DNS for a more secure navigation.
- Apply changes.
- Open the CMD and type ipconfig again to confirm the address.
How to assign an IP directly from CMD
The other option to set static IP in Windows 11 is through CMD commands. It’s less visual but the process is very fast and easy to follow.
- Open CMD panel.
- Type ipconfig/all.
- Use the following syntax to introduce the new IP: netsh interface ip set address name= “ADAPTATOR” static IP SUBNET MASK GATEWAY
- Use the syntax to introduce the DNS: netsh interface ip set dns name=”ADAPTATOR” static IP_DNS
- Validate the changes typing the ipconfig/all command.
The static IP selection is useful to do network tasks more efficiently. This is because the IP address won’t be changing all the time.